Thanks Susan for hosting Tablescape Thursday every week!
Here is a post from last year about making my Valentine's Day Centerpiece. Hope you enjoy it. Next Tablescape Thursday, the whole table!!!!
Last year, when I took my Valentine's Day Centerpiece apart I took pictures as sort of a step by step. I thought I would share them on this blog.
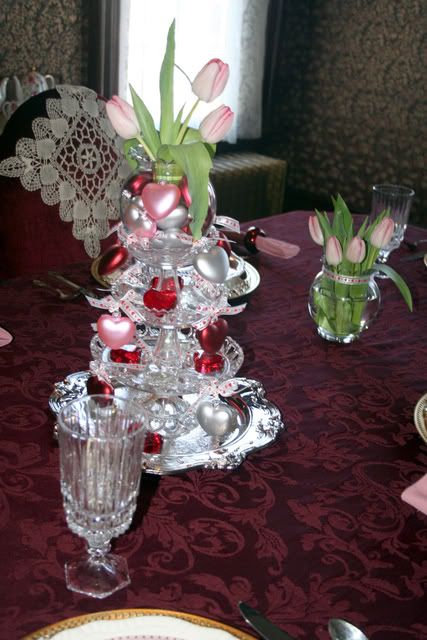
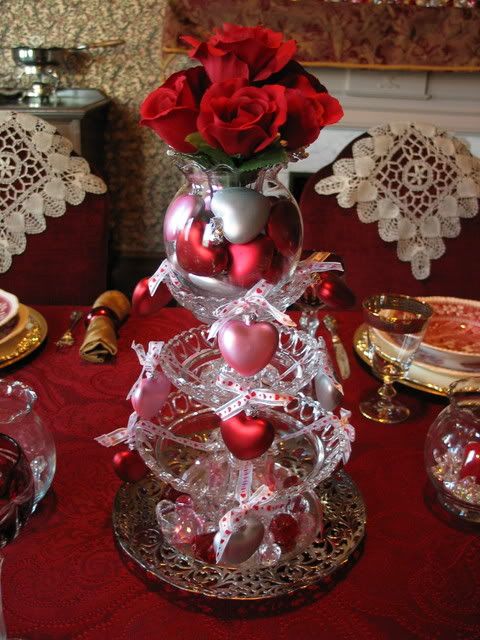
First I gather the materials: a tray, my glass stacking cake plates, a round glass vase, a sherry or cordial glass, blown glass hearts in silver, red and pink (purchase from WalMart several years ago), ribbon, red and clear glass hearts.

First, I fill the glass vase about half way with loose hearts.

Then, I carefully slip the sherry glass into the vase, nestled among the hearts.

I add a few more hearts around the sherry glass.

I have tied ribbon through the hanging loop of 4 hearts and then tied a decorative bow over the knots.

I lay the ribbons on the smallest cake plate and then put the round vase on top.

I have 2 slightly longer ribbons connecting 4 more hearts that I lay over the medium cake plate.

Repeat with 2 even slightly longer ribbons and the largest cake plate.

Place the stacked cake plates on a tray and decorate the tray and the largest cake plate with red and clear glass hearts.

Carefully pour some water in the sherry glass if you are using fresh flowers. If using silk, obviously the water is not needed. I have used camellias from my yard, purchased tulips and silk roses.


That is just stunning Jewel! The roses are the crowning touch of glory! Thanks for the lovely tutorial too! Cindy
ReplyDeleteNow that is just fabulous looking. Thanks for the tutorial. I just love it all. Such a beautiful centerpiece and so creative. Hugs, Marty
ReplyDeleteOh how pretty! Thanks for sharing not only the picture of the centerpiece but all the steps in creating such a lovly Valentine look for your lovely table.
ReplyDeleteOh, Jewel! I love this! How inventive! It's very pretty and thanks for telling me how to make this.
ReplyDeleteBe a sweetie,
Shelia ;)
What a great looking centerpiece...I just bought a big bag of heart ornaments at IKEA...now I know what to do with them!
ReplyDeleteJust awesome girl...I loved how you did this centerpiece Thanks for the how to...Hugs and smiles Gl♥ria
ReplyDeleteThat looks great! Thanks for showing us how!
ReplyDeleteBeautiful centerpiece!
ReplyDeletePerfect Valentines centerpiece.
ReplyDeleteSusan
What a beautiful centerpiece,CJ. You are so creative! I could not come up with much of anything last night when I was doing my table. Some days all the creative juices just refuse to flow. :)
ReplyDeleteThis is gorgeous, with a wonderful step by step!
ReplyDeleteWhat a clever and pretty centerpiece! Thanks for showing us how to do it. laurie
ReplyDeleteWhat a clever idea. Thanks for sharing this!
ReplyDeleteLove your Valentine table. Thanks for sharing. Lia
ReplyDeleteOh, really smart. Thanks for showing this centerpiece, wouldn't have thought of that.
ReplyDeleteJewel, this is awesome! I never would have thought of this in a million years...sooooo clever and beautiful! Thanks for the step by step.
ReplyDeleteI love that you stuck by your porch ceiling color! ;-) That painter just didn't understand. ;-)
Such an awesome and innovative centerpiece. Thanks for sharing. Must try this out for Valentines.
ReplyDeleteLisa. Trinidad WI.